本文最后更新于:2020-05-24 18:46
最近买了一台带宽5m的服务器,利用闲置的带宽来搭建个人影音中心
基于腾讯云Ubuntu Server 16
前言
H5ai是一款功能强大 php 文件目录列表程序,由德国开发者 Lars Jung 主导开发,它提供多种文件目录列表呈现方式,支持多种主流 Web 服务器,例如 Nginx、Apache、Cherokee、Lighttpd 等,支持多国语言,可以使用本程序在线预览文本、图片、音频、视频等。1
准备工作
更新软件源及软件包
1
2
3
| sudo apt update
sudo apt upgrade
sudo apt dist-upgrade
|
安装aria2
1
| sudo apt install -y aria2
|
配置aria2
修改配置文件
创建aria2的配置文件夹及文件
1
2
| mkdir /home/ubuntu/.aria2
vi /home/ubuntu/.aria2/aria2.conf
|
在新文件中写入以下内容并保存(第2行的rpc-secret你想设置的密钥)
1
2
3
4
5
6
7
8
9
10
11
12
13
14
15
16
17
18
19
20
21
22
23
24
25
26
27
28
29
30
31
32
33
34
35
36
37
38
39
40
41
42
43
44
45
46
47
48
49
|
rpc-secret= 123456789
enable-rpc=true
rpc-allow-origin-all=true
rpc-listen-all=true
max-concurrent-downloads=5
continue=true
max-connection-per-server=5
min-split-size=10M
split=10
max-overall-download-limit=0
max-download-limit=0
max-overall-upload-limit=0
max-upload-limit=0
dir=/home/ubuntu/webroot/download
file-allocation=prealloc
check-certificate=false
|
运行aria2
1
| aria2c --conf-path=/home/ubuntu/.aria2/aria2.conf -D
|
设置aria2开机自动启动
在最下面加入:
1
| aria2c --conf-path=/home/ubuntu/.aria2/aria2.conf -D &
|
安装AriaNg
先要安装http服务
1
| sudo apt install -y apache2
|
修改apache2默认文件夹
apache2的默认文件夹在/var/www/html,平时使用不方便,因而改为/home/ubuntu/webroot,方法如下:
1
2
| mkdir ~/webroot
sudo vi /etc/apache2/apache2.conf
|
找到
1
2
3
4
5
| <Directory /var/www/>
Options Indexes FollowSymLinks
AllowOverride None
Require all granted
</Directory>
|
在其下方添加以下内容并保存退出
1
2
3
4
5
| <Directory /home/ubuntu/webroot>
Options Indexes FollowSymLinks MultiViews
AllowOverride All
Require all granted
</Directory>
|
然后修改000-default.conf:
1
| sudo vi /etc/apache2/sites-available/000-default.conf
|
找到DocumentRoot /var/www/html,改为DocumentRoot /home/ubuntu/webroot即可
下载AriaNg
AriaNg 是一个让 aria2 更容易使用的现代 Web 前端
1
2
3
4
5
6
| cd ~/webroot
mkdir AriaNg
cd AriaNg
wget https://github.com/mayswind/AriaNg/releases/download/1.1.4/AriaNg-1.1.4.zip
unzip AriaNg-1.1.4.zip
rm AriaNg-1.1.4.zip
|
搭建h5ai
安装php服务
1
2
| sudo apt install -y php libapache2-mod-php
sudo /etc/init.d/apache2 restart
|
下载h5ai
1
2
3
4
| cd ~/webroot
wget https://release.larsjung.de/h5ai/h5ai-0.29.2.zip
unzip h5ai-0.29.2.zip
rm h5ai-0.29.2.zip
|
修改 apache 配置文件
1
| sudo vi /etc/apache2/mods-available/dir.conf
|
将DirectoryIndex index.html index.cgi index.pl index.php index.xhtml index.htm改成:
1
| DirectoryIndex index index.html index.php /_h5ai/public/index.php
|
添加用户名和密码
1
| vi /home/ubuntu/webroot/_h5ai/public/index.php
|
在第二行,也就是<?php下面添加一行,内容为:
在最下面另起一行添加以下内容:
1
2
3
4
5
6
7
8
| function passwd(){
$user=array('用户名','密码');
if(!($user[0]===$_SERVER['PHP_AUTH_USER'] && $user[1]===$_SERVER['PHP_AUTH_PW'])){
header('WWW-Authenticate: Basic realm="138vps"');
header('HTTP/1.0 401 Unauthorized');
die("please login");
}
}
|
其中用户名和密码改为你自己的,此为登陆h5ai之用
修改相关权限
1
| sudo chmod 777 -R /home/ubuntu/webroot
|
重启apache服务器
1
| sudo /etc/init.d/apache2 restart
|
至此,服务上的配置完毕
网页使用h5ai及AriaNg教程
h5ai
在浏览器中直接输入你服务器的 ip,在以下弹窗中输入上面设置的用户名及密码即可进入 h5ai 界面
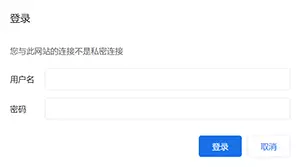
登陆后界面如下:
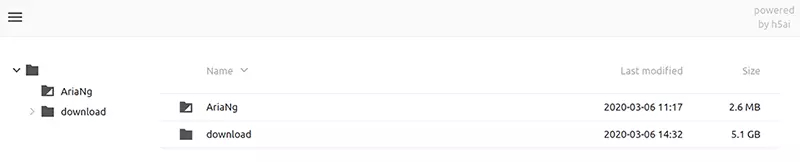
download 文件夹为下载的电影
AriaNg
点击页面上的 AriaNg 即可跳转进入 AriaNg 页面
点击AriaNg页面左边的 AriaNg设置,切换到 RPC 选项卡,找到下面的 Aria2 RPC密钥,填入修改配置文件设置的密钥,然后点击页面右上角的 重新加载AriaNg 即可
连接成功后,尽情下载影片,然后打开h5ai的download文件夹在线看电影吧